
Used RV Inspection Checklist: What to Check Before You Buy
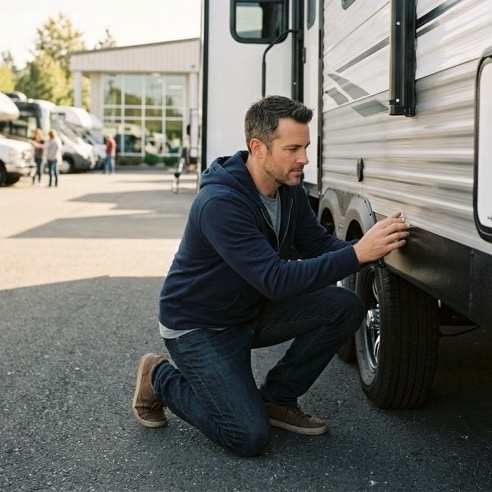
Buying a used RV can save you tens of thousands of dollars, but it also transfers someone else's maintenance history to you. The good news is that most of the expensive surprises are discoverable before you sign. This used RV inspection checklist walks through the exterior, roof, interior, systems, drivetrain, and paperwork so you can find problems while you still have leverage.
Quick win: Bring a flashlight, a small ladder or step stool, a moisture meter (optional), and a notepad. Budget at least 90 minutes for a full inspection, and never rely on the seller's "it's all in great shape" summary alone.
🧭 Before you arrive
- Confirm the VIN in advance: Ask for the VIN and run a title-history check (or a Carfax-type report for motorhomes).
- Check recalls: Use the manufacturer or NHTSA database with the VIN.
- Ask for records: Request service records, appliance dates, tire date codes, and any prior repair history before you visit.
- Bring the right gear: Flashlight, step stool, phone with a flashlight, paper towels, and a camera for photos.
- Set a time budget: Plan a full exterior pass, a full interior pass, a systems test, and a test drive.
🧱 Exterior, sidewalls, and seals
- Sidewalls: Look for bubbles, wavy panels, or color differences that suggest delamination.
- Seams and trim: Check for cracked, dried, or missing sealant along seams, windows, and corners.
- Windows and doors: Open, close, lock, and test screens and seals. Check for cracks or fogged glass (failed seals).
- Awnings: Extend and retract; look for tears, mildew, and bent arms.
- Slide-outs: Run them in and out fully; watch for binding, grinding, and gaps in the weather seal.
- Storage bays: Verify locks, latches, lighting, and that floors are dry and not soft.
- Undercarriage: Look for rust, loose hangers, fresh scrapes, and any signs of a flood or crash repair.
- Lights and signals: Test running lights, brake lights, turn signals, and marker lights.
🏠 The roof: the most expensive place to skip
Roof leaks are the #1 source of expensive RV damage, and they are easiest to catch early.
- Walk the roof (if safe and the seller allows) or use a step stool for a close look.
- Check the membrane: Look for cracks, bubbles, lifts, and abrasion near the edges and front cap.
- Inspect all sealant: Pay extra attention to vent caps, skylights, A/C units, and roof antenna mounts.
- Press around fittings: Soft or spongy areas around vents or the A/C can mean water intrusion below the membrane.
- Check for signs of prior leaks: Discoloration, sagging ceiling panels, or water stains inside.
If the roof has any soft spots, treat it as a major negotiating point or walk away. Water damage is expensive and rarely fully visible from the outside.
🛋️ Interior: find the water story
- Ceiling panels: Look for stains, sagging, or wrinkling — often signs of a past or active roof leak.
- Floors: Walk the entire floor and press around edges, corners, and under windows for soft spots.
- Walls: Check for delamination, bubbling, or discoloration around windows and slide-out openings.
- Mildew and odor: A strong musty smell can indicate hidden moisture. Check closets, storage bays, and the bathroom.
- Cabinets and drawers: Open every door; check latches, alignment, and signs of water damage at the base.
- Furniture: Test recliners, dinette benches, and bed lifts.
- Windows again from inside: Look for condensation staining and failed seals.
💧 Plumbing, tanks, and appliances
- City water test: Turn on every faucet (hot and cold) and check under sinks for leaks.
- Water pump: Run it and listen for cycling that could indicate a slow leak.
- Water heater: Test both electric and propane modes if possible.
- Toilet and valves: Flush, check for drips, and verify dump valves seal and move smoothly.
- Tanks and sensors: Ask about tank condition; corroded or cracked tanks are costly.
- Refrigerator: Run it on electric and, if possible, propane; confirm it cools.
- Stove, oven, and microwave: Ignite burners, check the flame, and test the microwave.
⚡ Electrical, batteries, and generator
- Shore power: Verify outlets and GFCI resets work.
- Battery system: Check battery age and date codes, and whether the system holds a charge.
- Inverter and converter: Confirm they switch correctly between power sources.
- Generator (if equipped): Start it under load (run the A/C) for 10+ minutes and check for odd noises or smoke.
- Control panel: Test the monitor readings and system toggles.
🌡️ HVAC and vents
- A/C: Run it long enough to confirm it actually cools.
- Furnace: Test every zone and listen for unusual noise.
- Fans and vents: Ensure they run quietly and seal closed.
🛞 Tires, brakes, and drivetrain (motorhomes)
- Tire date codes: Look for the DOT code on the sidewall. RV tires over 5–6 years old are often a replacement item regardless of tread.
- Tread and sidewalls: Check for cracks, bulges, and dry rot.
- Spare tire: Confirm it is present and in usable condition.
- Brakes and suspension: For trailers, verify the brake controller and coupler. For motorhomes, test braking and steering.
- Engine and fluids (motorhomes): Check oil, coolant, transmission, and brake fluid; look for leaks.
- Belts and hoses: Look for cracking, wear, and age.
🧾 Paperwork, title, and records
- VIN match: Confirm the VIN on the RV matches the title and the seller's listing.
- Title status: Verify the title is clean and note any lien or payoff requirements.
- Maintenance records: Genuine records add confidence and negotiating value.
- Recall check: Confirm any open recalls are addressed.
- Appliance and owner manuals: Make sure major systems have manuals and know their ages.
🧪 Test drive and function check
- Motorhomes: Test braking, steering alignment, cameras, cruise control, and check for alignment pulling.
- Trailers: Confirm hitch height, weight-distribution setup, and brake controller function.
- Slides and leveling: Run leveling jacks and slides through full cycles.
- Final listen: Drive (or move) long enough to catch rattles, and check mirrors and sightlines.
📝 Budget for repairs before you negotiate
RVs almost always need something. Use the inspection to build a repair list before you talk price.
| Found Issue | Typical Cost Signal | Negotiation Impact |
|---|---|---|
| Old tires (5+ years) | Replacement is often expected | Meaningful deduction |
| Minor sealant cracks | Small DIY fix | Small |
| Roof soft spot | Potentially major repair | Major deduction or walk away |
| Water stains on ceiling | Investigate before buying | Major |
| Slide-out binding | Could be adjustment or repair | Moderate |
| Dead battery | Inexpensive | Small |
| Non-working A/C | Repairable, costly in summer | Moderate to major |
| Missing title or lien | Title/lien risk | Major or walk away |
Get a written repair quote if issues are significant, and use it as a negotiating baseline. If you are not comfortable inspecting a roof, slide-out, or motorhome drivetrain yourself, a paid third-party RV inspector is often worth the fee on a high-value unit.
❓ Frequently asked questions
Should I hire a professional RV inspector for a used RV?
For a higher-value unit, or if you are unsure about roofs, slides, or drivetrain, a certified RV inspector can be worth several hundred dollars — far less than a hidden water-damage repair.
How long should a used RV inspection take?
Plan for 90 minutes to two hours for a thorough hands-on inspection, plus a separate test drive if the unit is drivable.
What is the most important thing to check on a used RV?
Water intrusion. Check the roof sealant, ceiling stains, soft floors, and around every window and slide-out. Water damage is expensive and often hidden.
How old is too old for RV tires?
RV tires are typically replaced on age as well as tread — generally every 5 to 6 years, regardless of wear. Check the DOT date code on the sidewall.
Can I get a used RV inspected before I commit to buy?
Yes. A clean inspection report can also strengthen your negotiating position. If major issues surface, you can request a repair, a price adjustment, or walk away.
🚀 Final thoughts
The goal of a used RV inspection is not to find a perfect RV — it is to find an honest one and pay a fair price for what is actually there. Know the VIN, walk the roof, follow the water, test the systems, and document everything. When you find a used RV that passes inspection, compare competing offers so you buy with confidence and the strongest price.
Compare dealer offers for free
Found an RV you like?
Compare written offers from verified dealers through RVbig before you commit — free and no-pressure.